Friday 29 October 2010

Research Continues...

Today was a day for research. Or at least that's what I thought before I started.

Continuing on with 'In Silico', I worked through Chapters 12-13. This introduced MEL scripting, and also looked at importing numerical data into Maya. These chapters seemed to ramp up the complexity significantly on previous material, and were difficult to follow. Although I worked through all of the examples, nothing has stuck in my mind and I feel like I haven't gained a huge amount... except the mess of expressions and terms floating around in my mind.

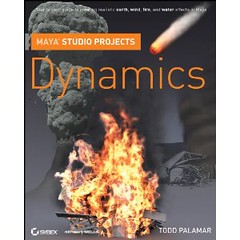
After struggling with the In Silico material, I chose to shift focus to something more creative (and let's say more interesting). Instead of using the Gnomon material to explore the use of dynamics, I have started working on a new book, on loan from the University Library. 'Maya Studio Projects: Dynamics' is written by Todd Palamar and published by Sybex, and deals with creating realistic earth, wind, fire and water effects in Maya. Although my interest lies within creating fire, I decided to look at the particle stuff and see how it compared to using the older Gnomon material.

Studio Projects Dynamics

Within a page of starting, I was already working with simple dynamics setups in Maya. The book was clear, and easy to follow. It made use of high-quality images to complement the textual instructions - something the Gnomon DVDs struggled with.

The first chapter of the Studio Projects book deals with using particles, and has you creating and customising emitters, whilst playing with different types of particles and changing the appearance of the outcome. It uses simple expressions alongside the normal Maya interface. Having completed a couple of examples, I felt better about today's work.

Who knows, after time, the complicated approach of In Silico may make sense. In the meantime I'll walk before I can run, and give this new book a chance.


The first video example shows a comet 'flying' along a path. This was created by applying a lifespan to the particles which 'trailed' from a sphere. Ramp shaders were also applied to colour and transparency values.


The second video example shows an asteroid belt 'orbiting' around a planet (pre-supplied). This was an experiment in using a NURBS circle to emit particles, and then containing them with a cylindrical volume. A ramp was also applied based on the size of the spheres, which was randomised using a simple expression.

Thursday 28 October 2010

Target Acquired

This week I have had meetings with students from the University's Mathematics division, with the intention of beginning a collaborative visualisation project.

After introductions and a brief discussion of the topic, I will undertake work which will involve developing more visual methods of visualising mathematical cell data - that is, data generated from mathematical models designed to project movement or growth of cancer cells.

Working with students outside of Duncan of Jordanstone will pose it's own problems though - artists and mathematicians speak very different 'languages' and this will be a tremendous learning opportunity, giving me experience of working with new people, in new subject areas (cell biology and mathematics).

This also opens up a huge variety of possibilities in terms of creativity, and will allow me to continue my work as a 3D artist, developing skills in dynamics and fluids, amongst other things. I will also have the opportunity to work with real-world data, and engage in research alongside another department within the University - a positive outcome in many ways for those involved.

With a goal in sight, and areas of development to focus on, this really is 'target acquired'!

Friday 22 October 2010

Gnomon Dynamics 1 : Galaxy Spiral

Today I decided to approach the Gnomon material, giving 'In Silico' a rest before starting on the more complicated MEL scripting chapters.

Gnomon's Dynamics 1 disc is designed as a basic introduction to dynamics, and according to the package, introduces the following tools;
Particle Tool, Create Emitter, Directional Emitters, Volume Emitters, Various Fields, Hardware Rendering Techniques
Quite an extensive list for an introduction, especially with a runtime of only 110 minutes. I say only... after getting about 9 minutes in, my imagination was already running wild and I had been well and truly distracted by the possibilites of 'painting' particles directly into a scene.

With the addition of two fields (Turbulence and Vortex) I had created a swirling galaxy system using only particles. I knew that I wanted to develop this scene further and see what I could do with it. I created a basic ramp shader and using a simple expression, coloured the particles based upon their distance from the scene's origin point.

After an hours worth of tinkering and playing around with these simple tools in Maya, I remembered the Gnomon Dynamics tutorial I should have been watching - not that it felt immediately important, I had created something really spectacular all by myself...

Thursday 21 October 2010

In Silico : Chapters 8-11

The next few chapters of 'In Silico' were focused on shading and lighting a scene, followed by animating a camera and finally rendering a finished piece.

I was given a scene which contained four objects which were already modeled and animated. A background plane was then added, and I applied simple coloured shaders to each object, and created a standard 3-point lighting setup (using key, fill and back lights). Shadows were enabled using depth-maps rather than raytracing. A camera was created with an aim constraint (a new technique to me) which forced the camera to always look at a designated point (around which you can then freely rotate). The camera was also attached to a circular motion path to give it a smooth consistent movement.

According to the author, the four objects in the scene represent the four chains (or subunits) of hemoglobin - the oxygen-transport molecule found in red blood cells.

This was my first attempt at working with this kind of data. I found it very interesting, and gained an understanding of how important photography/cinematography techniques are, and should not be underestimated when visualising information.

Another important point to make, is that we can still clearly see what is happening within the video - proof that the use of photo-realistic visuals is not always necessary. However, without pointing out that it depicts a hemoglobin molecule, it does not make much sense. A descriptive title can work wonders for a scene which has simpler visuals.

Wednesday 20 October 2010

In Silico : Chapters 1-7

So far this week, I have been reading 'In Silico', and working through the tutorials provided. I had previously completed a lot of work within Maya, so the majority of material covered was not new to me... until I reached the section on dynamics, something I haven't worked with before.

As part of this new material, I created a simple dynamics system - a cylinder filled with tiny little spheres, which would 'float' around and collide with the cylinder and each other. This was created using a particle emitter, and although somewhat basic, has already opened my eyes to the benefits of using the dynamic system. The ability to create a fully animated scene by simply just setting up some object properties is amazing. Certainly much easier than trying to animate each object individually (there were 200 spheres) and far more realistic!

In addition to realising the potential of using dynamics, I was also introduced to my first piece of MEL scripting. MEL stands for Maya Embedded Language and is a scripting language within Maya. I used MEL to apply colour to each of the spheres based on their proximity to other spheres. They are normally black, and become more red as they get closer to other spheres, becoming fully red upon collision. Using colour made the simulation clearer - something which will be very important in later work that I undertake.

Finally, I created a quick playblast of the simulation. Nothing fancy, or complicated, but it shows the start of my research into using dynamics and scripting within Maya.

Monday 18 October 2010

And so it begins...

After speaking with my programme leader/supervisor, I have decided to focus on visualisation and developing my skills and abilities towards this. This will include looking at using things such as Maya's dynamics systems, particles and scripting capabilities - all new to me.

I have chosen to spend Reading Week looking at these particular areas, and have picked two main sources to help lead my practice.

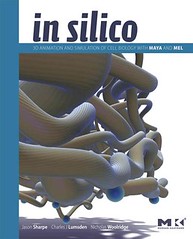
The first of these is a book that came specifically recommended - 'In Silico: 3D Animation and Simulation of Cell Biology using Maya and MEL', written by Jason Sharpe, Charles J Lumsden and Nicholas Woolridge, and published by Morgan Kaufmann Publishers. This book will be used to augment my existing Maya knowledge, and develop skills which are directly related to visualising cell biology.

InSilico

The second source(s) I have chosen, is a set of DVD tutorials from The Gnomon Workshop called Dynamics. There are a great number of these, but I will be trying to start at the beginning and build a strong foundation. I currently have discs 1-3 from the University library to get me started.

GnomonDynamics

Hopefully these sources will get me going in the right direction, as next week I hope to have a meeting with the University's Mathematics department, and possibly start working on a visualisation project with them.

In the meantime, keep your eyes posted for examples of what I've been doing this week... once I've done it of course!

Wednesday 13 October 2010

Research Skills & Methods : Contextual Review

As part of the module titled Research Skills & Methods, I was required to write a contextual review. Using 5 keywords, I was tasked with sourcing relevant information, and subjecting it to critical analysis, within a 600-800 word limit. My completed assignment is shown below;

Title
The aim of my research is to explore the collaboration between art, science and technology (3D computer graphics and animation) in the field of visualisation.

Keywords
3D, Computer, Graphics, Animation, Visualisation

Contextual Review
The idea of artists and scientists working together to achieve a common goal is not a new one. In fact, it is this collaboration that has not only challenged the way we perceive complex technical ideas, but also pushed existing concepts forwards.

Cox (2008) introduces us to the idea of the "interdisciplinary ‘Renaissance team’” – which brings art, science and technology together, and directs research towards solving complex problems. By embracing this cross-disciplinary approach, we are granted the best of both worlds – the technical knowledge and understanding of the scientist’s mind, combined with the creative skills and abilities of today’s artists. Add to this, modern technology (such as 3D computer graphics and animation), and we open the way to research which is truly innovative and inspiring, and as Cox confirms, allows these ‘Renaissance teams’ to “make significant contributions to new visual research”.

Sandin et al (2006) also discuss the idea of creating a ‘Renaissance team’, re-emphasising its importance in bringing together the best artists and scientists and creating work that is “both beautiful and of great communication value for the scientists”. An important point is raised however, explaining that to be worthwhile, individual members should receive merit for their own personal contributions “as measured within their own disciplines”. By mentioning this, Sandin et al are suggesting that these Renaissance teams are not yet fully integrated, and still require merit in each subject area, and not just as a whole.

If we examine the ‘Renaissance team’ and consider each of the individual contributions, the scientist’s work often serves as the foundation for modern visualisation projects.

Scientific research is often quantitative and is responsible for generating a huge amount of information or data (often numerical) which is kept it it’s purest form. Cox tells us that this data is normally gathered and collated by computers, reinforcing the importance of technology, as gathering this amount of data by hand would be a laborious process.

However, this collected data is often incomprehensible to anyone other a specialist in the scientific subject area. The main problem with this approach is that a scientist will typically present information to a varied audience, many of whom may not fully understand the ideas that are being explained.

Despite the apparent difficulties in communicating complex ideas, many scientists continued to work like this. As an example, Cox draws our attention to the work of David Onstad – an entomological researcher, who gathered his data over many years. Cox tells us how Onstad chose not to use computers to help during his research, and did not collaborate with artists (initially anyway) and instead ended up studying his simulations in computer printout form.

This problem of trying to communicate dense technical information provides a unique opportunity for artists to collaborate with scientists.

Sandin et al explain the importance of the artist in providing a solution, as they are more accustomed to organising projects, using experience gained from presenting at exhibitions. They also bring a new level of creativity to any type of research, and as Sandin et al point out, are often known for their abilities in not only creating new media, but also finding “new ways of working with media”.

Artists often find inspiration in the strangest of places, but as Sandin et al illustrate, science is a “great source of imagery”. The artist’s work can then be tailored to creating something new and unique, crossing multiple disciplines, and communicating ideas that previously could not be explained easily.

One point made by Sandin et al which many would disagree with, is that science is better supported than art. With the advent of technology and the ability to create 3D computer graphics, the artist’s role is becoming more important than ever. Especially since Cox’s original idea of the ‘Renaissance team’ included an artist and a computer specialist – two separate roles entirely, but now combined into one.

Cox also touches upon this idea of technology usage, and considers computer graphics as the ‘bridge’ between science and art – the catalyst for exploring new ideas and concepts, and for making the invisible visible.

When discussing the collaboration between art, science and technology there are many minor differences in opinion. However, each article shares a common view – that the collaboration between art and science, facilitated by rapidly improving technology, has been a positive step, opening doors to new research ideas and methods. This multi-disciplinary approach has changed the way scientists and artists work for the better.

To summarise, Cox makes an interesting final observation;
“Supercomputers, graphics and creative human beings have the power to bring about visual enlightenment with regard to too much in this universe that was formerly abstruse mathematics.”
[Word count: 774]

References
Cox, Donna J. (2008). Using the Supercomputer to Visualize Higher Dimensions: An Artist’s Contribution to Scientific Visualization. Leonardo 41(4), 391-400. Retrieved October 8, 2010, from Project MUSE database.

Sandin, Daniel J. et al (2006). The Artist and the Scientific Research Environment. Leonardo 39(3), 219-221. Retrieved October 8, 2010, from Project MUSE database.

Monday 11 October 2010

24 Hour Film Project : 'Stairs To All Floors'

Despite being fresh-faced and looking generally lost most of the time, Animation and Media Art students were thrown together and given a challenge - to create a short film within a 24 hour period.

Working alongside three of the Media Art students, I helped plan, film and edit a short film which showed a character's first day at Duncan of Jordanstone, through a point-of-view perspective. The emphasis was on the lack of sign-posting and direction within the art college, and building pace as the character gets more and more lost, achieved through lots of quick cuts between segments which gradually got faster and faster.

Whilst planning this film, we discovered lots of old signs and directions which helped add to the overall sense of confusion. One sign, which showed the words 'Stairs To All Floors' became the title of our piece, as it seemed most oddly placed - nowhere near stairs, and not pointing to anything useful, emphasizing our film's message.

Overall, we were happy with the result, although we did not have time to use the additional recorded audio. We were planning on building up the layers of noise to match the pace of the video footage, but 24 hours was not a huge amount of time to create a masterpiece...

Friday 8 October 2010

Background 5 : The Gods Made Heavy Metal

This series of posts will show some of the examples I used as part of my Background & Aspirations presentation.

In this fifth and final post, I wanted to end with something a bit different - and a bit more fun!

'The Gods Made Heavy Metal' was animated using Adobe Flash, and components were created using Adobe Photoshop. It follows the narrative of a song by epic metal band Manowar, and describes how the Gods created heavy metal.

Without further ado...

Background 4 : Theseus And The Minotaur

This series of posts will show some of the examples I used as part of my Background & Aspirations presentation.

In this fourth post, I have chosen to showcase my final year Honours project - a short trailer for a fictional film called 'Theseus And The Minotaur'. I opted to create a trailer, so that I could focus on telling a story in a shorter space of time (and miss out all the boring bits).

This was an individual project, and I was responsible for all stages of production, which meant there were many long days and sleepless nights! Autodesk Maya was used for all 3D aspects, with Adobe Photoshop being used for image manipulation. Renders were taken into Adobe After Effects for editing, compositing, and adding audio. The final output was at a resolution of 1280x720.

Throughout this project, I experimented with Maya's built-in 'Toon Shader' feature, and also made use of the 'nCloth' dynamics system (used for the character's clothing, and ship's sails).

Background 3 : Male Figure

This series of posts will show some of the examples I used as part of my Background & Aspirations presentation.

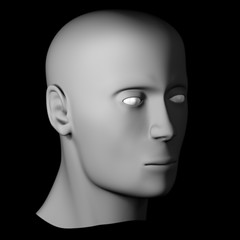
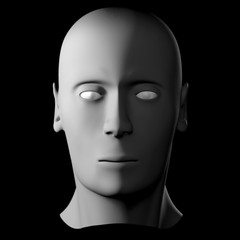
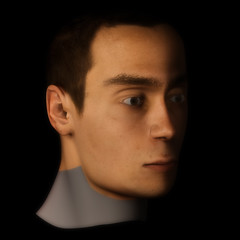
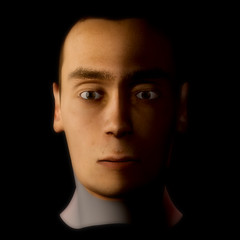
This third post illustrates advanced organic modeling, in the form of creating a realistic male head. This was created using a box modeling workflow in Autodesk Maya, and has a high level of realism, thanks to using photo references (of 'Simon').

Texturing was completed using the 'project and bake' method which was time consuming, but creates high-detail textures. These were created using Adobe Photoshop, and applied using Mental Ray's subsurface scatter shader (SSS).

Male Head (Bust 1) Male Head (Bust 2)
Male Head (Render 1) Male Head (Render 2)

Background 2 : Female Figure

This series of posts will show some of the examples I used as part of my Background & Aspirations presentation.

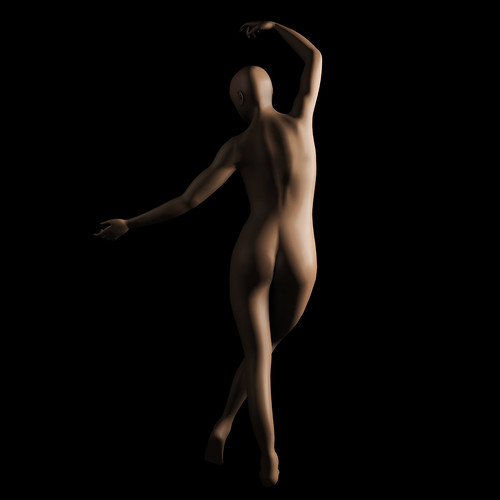
This second post shows the result of sculpting a female figure (using photo references of 'Claire') and was completing using Autodesk Maya. Particular attention was paid to creating the correct 'edge flow' so that the figure was correctly proportioned and anatomically correct.

After creating the finished model, I was required to re-pose her into something more creative. Multiple passes were rendered and taken into Adobe Photoshop, where attributes were tweaked. All texturing was 'faked' and was completed in 2D post-production.


Female Figure

Background 1 : The Well-Worn Interior

This series of posts will show some of the examples I used as part of my Background & Aspirations presentation.

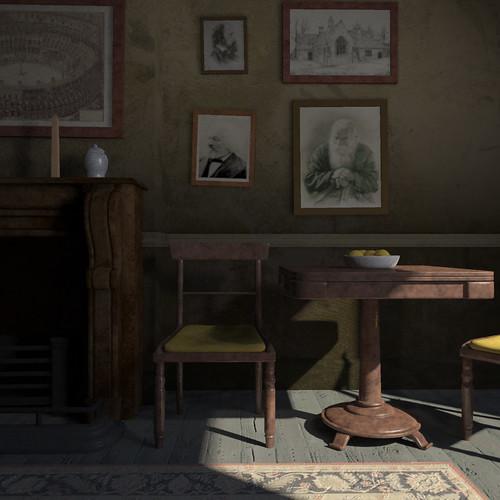
This first post showcases 'The Well-Worn Interior', which was carried out as one of my earliest 3D projects, and was completing using Autodesk Maya and Adobe Photoshop.

The Well Worn Interior