Since finishing my Masters degree, I have been involved with teaching some of this year's new Masters students at DJCAD.
More importantly, I have also been setting up my own business, and online photography store, below;
Dylan Gauld Photography
Feel free to have a look at my online store, and pass the link onto all of your friends and family members. Although you may not be interested in my products, they might be!
The best part of it all, is that there has never been a better opportunity to get a great Christmas gift at a discounted price - all orders placed before Christmas will receive a 10% discount, and include free UK delivery as standard.

Friday, 18 November 2011
Wednesday, 31 August 2011
Results
Yesterday, after a long and tiring year, we received the results of our Masters programmes. I wanted to include this post, as 'blog closure' - I think it is important that any readers can see the link between the amount of work carried out, and how that relates to the course requirements.
I was awarded a Master of Science with Distinction, in Animation & Visualisation.
I am not sure what the next step will be, as I am awaiting the results of applications being processed. Although I plan on continuing my work in the visualisation field, I am not sure what route this will take at the moment.. There are a few possibilities lined up, but as to which one is right for me...
... I guess I'm waiting for the clouds to make shapes and show me the way.
Friday, 26 August 2011
Thursday, 18 August 2011
Semester 3 Summary
A summary of work completed before beginning semester 3 can be found here.
Throughout semester 3, my main focus has been on using all of the techniques and skills developed previously to create finished animations which showcase the 3D visualisations I have generated, using mathematical data as a source.
The start of the semester saw me learning skills in using Nuke as a compositing tool, with a great deal of experimentation in establishing how important post-production was going to be; with the answer being very important. At this stage, I still did not have a clear idea of the final film I was going to create, although I knew roughly what I wanted it to contain.
Around the start of June, I started considering concepts for my final piece of work. It was decided that this would take the form of a short film (around 3-4 minutes in length), and would not only showcase the beauty of some of the visuals I wanted to create, but also contain an important message.
Throughout June I continued developing the 3D side of my work - which featured a heavy amount of texturing, lighting and even more rendering. This was important as it was crucial in developing the aesthetics which would feature in my final film.
I also moved into Photoshop and After Effects, starting to experiment with compositing the various elements that would make up my final shots (concept development examples here, here and here).
By mid-June I started to experiment with stereoscopic techniques. This was only intended as a sideline project - something that would not feature in my Masters Show deliverables, but would inform my technical skills for the future. After creating some simple examples, I started to realise that it would not be hugely difficult to implement stereoscopic cameras into the scenes I had already created. This would allow my work to be viewed in true three-dimensions, something which could prove useful (and later, very popular!).
In the latter half of June, I spent some time working on a shot for Kaye Cao, a classmate who wanted to have a 3D character filling up with liquid at the start of her final film. Because of my experience in using RealFlow, I was able to help and created the shot using a combination of RealFlow and Maya (which can be seen here).
Alongside the RealFlow work for Kaye, I carried on my cell visualisation development for a second mathematician, and created a two minute video which visualised over 33 million lines of mathematical data (a still image can be viewed here).
At the start of July I also began work on creating a fully CG explosion and shockwave for classmate Matt Cameron. This explosion would be used as the opening of his short film "Falling Out".
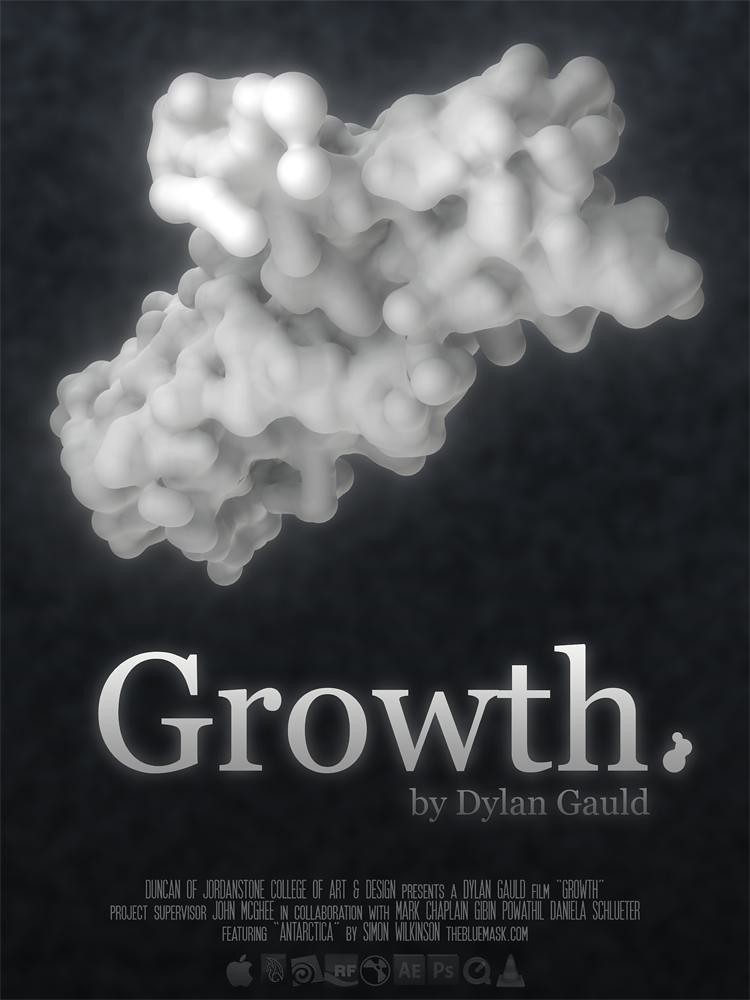
It was also at the start of July that I started to unveil some of the work I had completed on my short film. Titled "Growth", it was intended as a story with two distinct halves - the first would feature sweeping views of an unknown object, with the second revealing what was being viewed; intended as a 'shocking' introduction into the uses and benefits of 3D visualisation techniques.
Most of July involved a combination of rendering and compositing for Growth, and continuing the work on the Maya Fluids explosion for Matt. Growth proved difficult to composite, as it's runtime was going to be around 4 minutes, and I was working alone.
The explosion also proved time consuming - there were 20 versions of the explosion (all with several iterations each) and again, I was working alone on the 3D elements. The shockwave was much simpler, as I could adapt the customised fluid container I had created for the explosion. Matt composited the finished CG and live plates in Nuke, and created a visual effects breakdown.
Mid-July brought about a major change for Growth. The visuals were started to look muddy and dull, and the cells could not be easily differentiated from their environment. I took the opportunity to re-work the 3D shaders and lighting, and develop a brand new look, one that would be significantly better moving forwards.
I completed work on Growth around the start of August, leaving time to start compositing my stereoscopic material, create a showreel and start preparing for the Masters Show (full details of the material created can be found here and here).
Because I had completed the bulk of my own work, I spent some time during mid-August helping Mark Haldane with his short film, "Conflicting Ideas". Having never worked on traditional 2D animation, I was given a quick tutorial and dropped straight into colouring - I completed work on 4 shots.
Below is a summary of the projects and work I have completed during semester 3;
Individual projects
- Growth
- Growth: Making Of
- Stereoscopic Cell Visualisation
- Showreel (featuring non-visualisation work)
Collaborative projects
- Brainstorming (worked on one shot, using RealFlow to 'fill' a character with liquid)
- Falling Out (worked on opening shot, featuring a CG nuclear explosion and shockwave)
- Conflicting Ideas (worked as a colourist on four shots)
Monday, 15 August 2011
Friday, 12 August 2011
Masters Show
With the Masters show just over 2 weeks away, I have been working on the additional material which will support the main feature "Growth".
I have completed work on the 'making of' film and the stereoscopic material (my key objectives). I have also finished a short video which showcases some of the other cell visualisation material that did not make it into Growth.
In addition to this, I have also created a short video which will showcase additional work that I have completed (such as working with Maya fluids, RealFlow liquids, and other student projects that I have contributed to).
Run-times for the various elements are as below;
- Growth (3:56)
- Growth Making Of (4:54)
- Stereoscopic Showcase (2:34)
- Cell Visualisation Showcase (2:18)
- Masters Showcase (~2:00 - still to be finalised)
In addition to this a poster has been created, business cards have been ordered and 3d glasses are on their way!
Everything seems to be in place... next week we start building the show, so hopefully this will go relatively smoothly. It will also help me decide if there is anything else I need to prepare in advance!
For more information on the Masters show, and the students exhibiting, visit the website here.
For more information on the Masters show, and the students exhibiting, visit the website here.
Monday, 25 July 2011
Growth Compositing
Over the last few weeks, I have been trying to finish compositing "Growth".
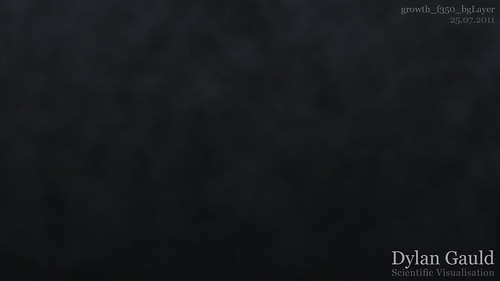
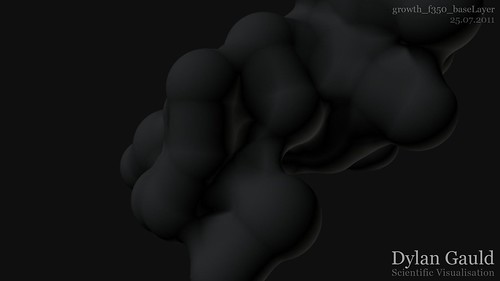
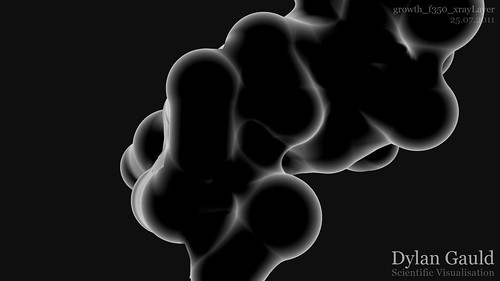
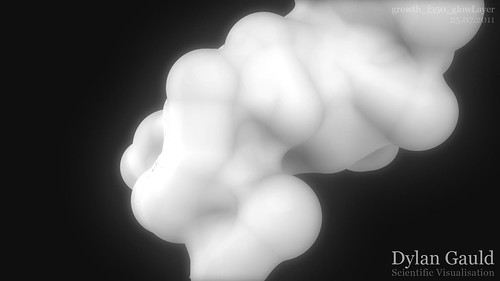
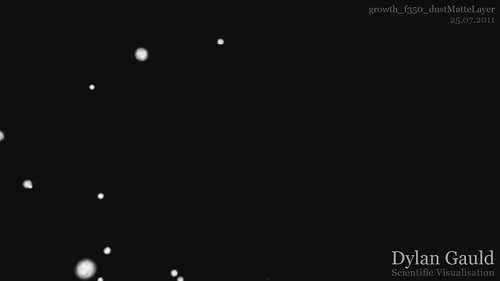
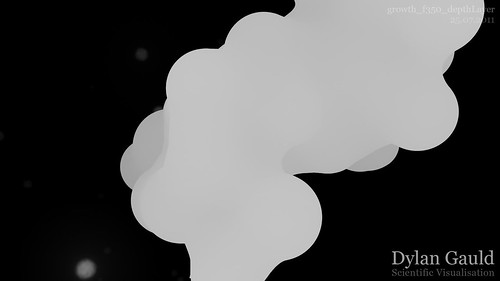
As mentioned in a previous post, I have been working in Nuke to put all of the render layers together and adjust all of the visual attributes. Growth uses a variety of passes (rendered out of Maya), and these are shown below;

I was initially having problems adding depth-of-field (my frames were acquiring 'stepped' edges) in Nuke, but as part of our masterclass with Hugo Guerra, I was able to get Hugo's help in fixing this (well, it couldn't be fixed, but we found a way to work around the problem!).
Beyond this, I was able to get some great feedback from two of my classmates, on how to improve the final output of my work.
Mark Haldane suggested that I 'grade' the cells, as they could do with a bit more contrast/definition.
Matt Cameron suggested that I should try adding motion blur and chromatic aberration.
At this stage, I had already created Nuke scripts for each of the shots, which would combine all of the render passes, add a background and calculate the depth-of-field.
I then created a second Nuke script, which would take this first rendered sequence and add the chromatic aberration, motion blur, and film grain.
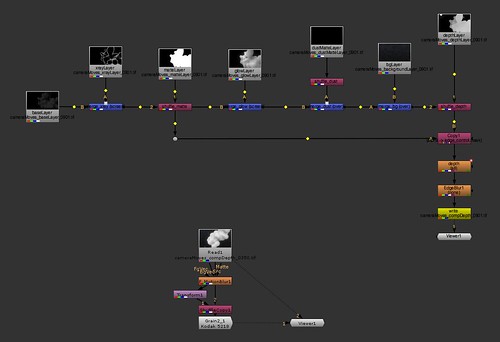
The image below shows one composited frame, after it's been through all of the stages outlined above;
Compositing has definitely transformed the outcome of my project. Although my main abilities are in 3D, I also realise the importance of compositing and how being able to use these additional skills can improve the presentation of my 3D work.
In the case of "Growth", the advice I have received has definitely been good, and is helping me to take my 3D work to the next level!
Wednesday, 20 July 2011
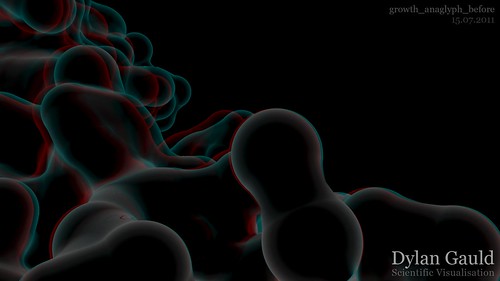
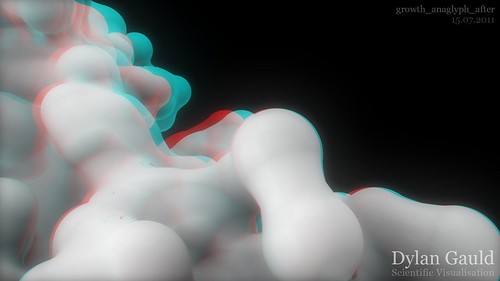
Growth In Stereoscopic?
Growth in stereoscopic? Wouldn't that be interesting...
After creating simple stereoscopic/anaglyph sequences previously (here and here), I decided that the dynamic flowing camera moves that I created for Growth would really take advantage of stereoscopic 3D. These shots are designed to view the cell growth and development from unusual close-up angles, and are animated to 'fly' close to the cell surface.
After speaking to my classmate Mark Haldane (who has previously created anaglyph material) and getting some feedback on previous stereoscopic efforts, I decided I wanted to test how it could look, so started work on setting up a still image.
I tried to enhance the amount of depth created by the stereoscopic camera setup, as there was not enough previously. Because some of my shots had cells moving off the edges of the frame, I wasn't sure how well they would work, but Mark suggested a way I could work around this problem.
Below are two images; the first showing the anaglyph effect applied to the original cell style I was using, and the second showing the effect applied to the new cell style (as a comparison).
With the Masters show opening just over a month away, I have started thinking about what content will form part of my show. Stereoscopic material is something I would really like to exhibit, but this comes secondary to completing Growth and it's 'Making Of' film.
Dependant on my time, I will continue to experiment with anaglyph renders, and hopefully have something worth showing!
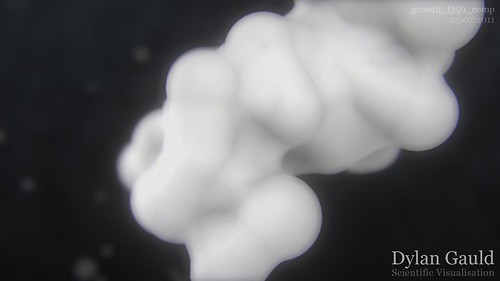
Sunday, 17 July 2011
Growth Visuals
Now that the timing and content is close enough to being finalised, I have spent some more time polishing the visual style of the cells.
Feedback has shown that the visuals are a bit 'murky' at the moment, and there needs to be more definition - something to make the cells 'pop' and stand out. The cells move in a really unique and interesting manner, so it is important that this is the focus of the viewer (so that all my hard work can be seen!).
My project supervisor suggested I take a look at a DVD in the library by Jeremy Vickery, titled "Practical Light and Colour" (more information here). This DVD discusses the fundamentals of light and colour, and how a better understanding can improve practical work. If anything, it serves as a fresh source of ideas and inspiration, which will hopefully develop my cell aesthetics and drive towards the best outcome possible.
After watching this DVD, I started experimenting with colours and light in Maya, trying to develop something which was much more interesting, less murky, and had more focus on what I wanted the viewer to see.
Below are two renders; the first showing a still from Growth before this DVD/experimentation, and the second showing a new version, which uses entirely new lighting, colours and Maya shaders to give a different style completely.
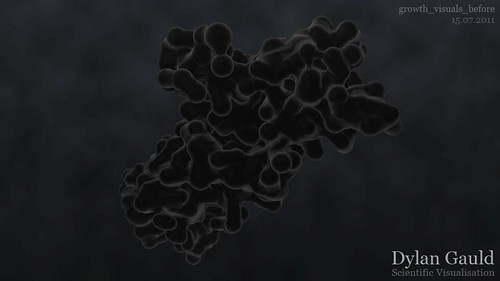
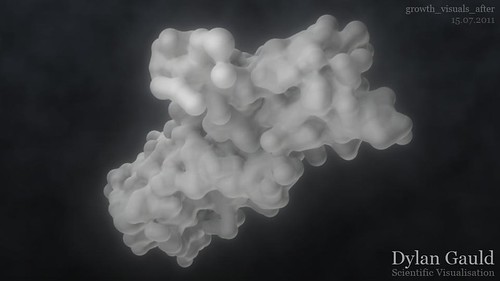
I have yet to test this new style on an animated sequence, but I definately prefer the clarity that this updated version offers. The cells have significantly more contrast (against the background) and are less flat - by adding an edge glow, they really draw the viewer's attention.
Thursday, 14 July 2011
Growth Progress Update
Since my previous post, I have continued working almost exclusively on 'Growth'.
All of the cell visualisation stages in Maya are completed (e.g. scripting, dynamics and render setup), and all the camera work has been (pretty much) finalised. Most of the rendering has now taken place, and I have spent a large amount of my time compositing the different shots and passes, using After Effects.
This uncovered several problems in the 3D work, such as dust particles floating in front of the camera, or 'through' the cells (which looks like they are being absorbed). These issues have taken longer to fix than expected, as it has meant rotoscoping out certain areas of some image sequences (primarily the depth passes). Although this is a time-consuming fix method, it is certainly much faster than recreating the particles and their movement in Maya, and then re-rendering several layers to be composited again.
One of the main issues I am currently experiencing is the use of depth of field in my shots. I want a really shallow depth of field, giving the correct impression of (macro) scale. After Effects has a feature called Lens Blur, which allows me to composite using Maya's depth pass. Unfortunately, this feature is quite limited in terms of the amount of effect that can be applied, and isn't enough for what I am trying to achieve.
Because of this, I have started setting up one of the shots in Nuke. I tested this by using After Effects to render out a composited sequence, and applied the depth using a ZBlur node in Nuke. I was much happier with results that Nuke gave (and the use of the 'focal-plane setup' feature) so I have decided to rebuild the shots properly, using only Nuke.
Since most of the composition is blocked out and timed in After Effects, I will render each shot entirely out of Nuke, and take the completed shot sequences back into After Effects (which is the most straight forward way of working for me). The previous alternative would have been to create the shots in After Effects, render out composites for Nuke, apply the depth and tweak the shots, then bring them back into After Effects - a much more complicated process. I still want to complete the final project in After Effects, as I am much more comfortable laying this out on a timeline (which is already done anyway).
As part of my testing, I have generated 3 versions of the same frame to show the visual differences. The first is the original composited shot, rendered out of After Effects. The second image shows the outcome of using After Effect's Lens blur to add depth of the field. The third image shows the outcome when using the ZBlur node in Nuke.
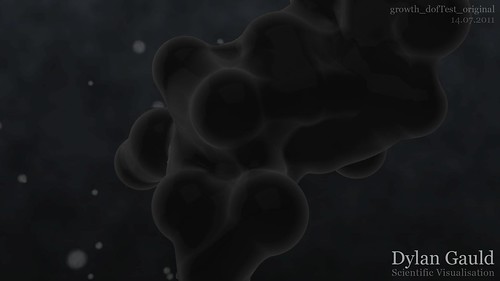
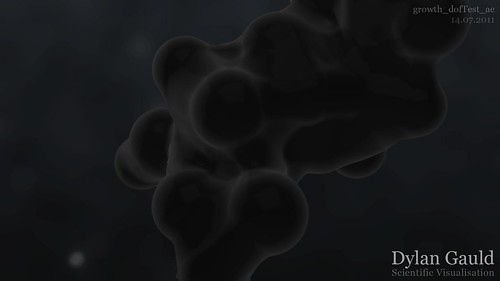

One thing that became apparent using Nuke, is that not only did it allow me to apply depth of field in the way I wanted, it created less banding in the rendered TIFF files. Banding is something I have struggled with so far (because of the subtle variances in colour), so this is another advantage of using Nuke!
Moving forwards, I plan to continue compositing the shots initially in Nuke, and then bring everything together in After Effects. This should be the best way of achieving the look I want, and avoiding the banding that was present in After Effects.
The next step beyond this, is starting work on a 'making of' video (for the degree show), which will contextualise the content of Growth, and provide more information on the methods used during it's creation.
Tuesday, 5 July 2011
Growth
Over the last two weeks, I have been developing the concept for the final outcome of my Masters project. This will take the form of a short video (approximately 3-4 minutes in length) and is intended to showcase some of the cell visualisation work I have completed. In addition to this, I plan on creating a second video which will be a technical showcase of my skills and abilities and also contextualise the work I have completed.
Although I don't want to give away too much, the main piece will be split into two halves, titled Growth. My title concept can be seen below;

As a sneak preview, the video below shows one of the shots I am currently working on in After Effects. Using the VERL render farm, I have already generated most of the content I plan on using (in 1920x1080 lossless TIFF format) which gives me a great deal of flexibility. The original shot did not feature any depth of field and looked flat and uninteresting, whereas this updated version has much more style and visual interest;
So far, I haven't decided if I will include the dust motes/particles idea which I previously worked on. Although I have considered this option, I don't have any sequence renders which I can use, so I took a still frame and applied the effect, as a test. This frame test can be seen below;
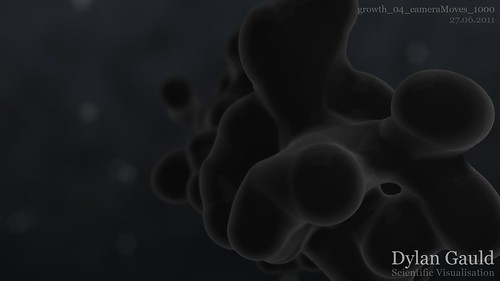
Moving forwards, I will continue developing the look and feel of these shots. I am also currently looking at using music to add impact to these shots, but this is an ongoing project and I plan on trying to finish work on the visuals first, so that I can get a good 'feel' for the experience I want to create.
Sunday, 3 July 2011
Stereoscopic Update
Following on from my early tests of creating stereoscopic content out of Maya (here), I have completed rendering and compositing of my full cell visualisation sequence.
The process of working with a sequence instead of a single frame was not hugely different, and I feel confident that I could apply an anaglyph effect to a scene in the future. Currently, as it is anaglyph, I have been working in grayscale, but moving into colour is something I would like to achieve.
I am planning on meeting with my project supervisor and programme leader, to discuss the possibility of showing stereoscopic material during the Masters show in August. I am not sure if this will be a viable solution, but it is worth looking into...
Friday, 1 July 2011
Falling Out
Matt Cameron, one of my classmates, is currently directing a short film titled "Falling Out" (production diary here). The logline for Falling Out is below;
So far, I have recreated the camera setup in my 3D environment (so the CG cameras match the real-world cameras), and completed some early explosion tests. Over the next few weeks, I hope to tighten up the explosion (which is not nearly nuclear enough) and generate some nice high-definition renders which will be suitable for the opening shot of Falling Out...
A pregnant woman struggles to find direction after a nuclear blast decimates Scotland. Locked in a bunker with a jaded survivalist and her dying boyfriend she faces tough choices in this brutally changed world.I will be assisting Matt in creating some of the visual effects which will be added to this film - in particular, using 3D computer graphics and animation to create a dynamically-driven nuclear explosion which can be composited onto a live plate at the beginning of the film.
So far, I have recreated the camera setup in my 3D environment (so the CG cameras match the real-world cameras), and completed some early explosion tests. Over the next few weeks, I hope to tighten up the explosion (which is not nearly nuclear enough) and generate some nice high-definition renders which will be suitable for the opening shot of Falling Out...
Wednesday, 29 June 2011
Composited Sequence
As part of my cell visualisation project, I have been working on a second set of data, which also represents the growth and development of cancer cells. This dataset however, focuses on the stage of which the individual cells are in, with the intention of identifying the most effective time for treatment to take place.
With thanks to one of the mathematicians working in this area, I was provided with a large quantity of data (around 33 million lines of numerical information) which had been generated, and could be used to drive my 3D visualisation. I created a MEL script which could 'read' each section of this data and then generate/animate the appropriate objects in 3D space.
After completing this stage, I then setup the scenes for rendering - adding lighting, placing cameras, adjusting render settings and creating render layers. Using the VERL render farm, I generated approximately 33,000 renders which could be composited together to create a completed 3000 frame sequence (depicting 600 hours of cell growth and development).
Using After Effects, I combined all of the image sequences and created several individual compositions which would be layered to create the final output. Because almost all of the work had been completed in Maya, there was very little that had to be done in After Effects, except combine the appropriate layers. Rather than generate a QuickTime MOV, I rendered a master image sequence (after speaking to one of my classmates) which could then be used to create suitable video files as and when needed.
Because the source of my output comes from unpublished mathematical models, I am unable to post any of the video online (it would be unfair to the ongoing research still being carried out). Instead, I have opted to include an image of a single frame, which can be seen below;
Over the next few weeks, I will be meeting with the mathematician that I created this for, as there are several upcoming maths conferences and events where my work could be used to illustrate the research they are carrying out.
Monday, 27 June 2011
RealFlow Character Fill
Over the last couple of weeks I have been working on a shot for one of the other students on my course. Kaye is working on applying an illustration style to an animated commercial, and her blog can be found here.
After creating her animatic, Kaye's opening shot showed a 3D character filling up with liquid, and she had decided to use RealFlow's liquid simulation tools to achieve this. I already had previous experience of working with RealFlow and was able to help her in building this sequence.
To begin with, I imported her character model (built using Cinema 4D) and created emitters in each of the feet. My target was to fill the model in approximately 180 frames, as this is what Kaye had advised. I started by filling the model using these two emitters, and adjusted the emission speeds to suit the fill rate I wanted. Around halfway up the model, it became slightly more difficult, as I had added two additional emitters (one in each hand) and then needed to try and balance the levels of the fluid (this involved manually keyframing each emitter and re-simulating the liquid several times, a time-consuming process). Upon reaching the head, a fifth emitter was added, to speed up filling the volume (as the narrow neck creating a fountain-like bottleneck). Finally, a polygonal mesh was added, and the radius size adjusted so that the mesh was not larger than the original model.
At this point, I passed the source files back to Kaye to implement in her own project. As an additional step I imported the RealFlow files into Maya and created a simple render to show the outcome of this short project;
Monday, 20 June 2011
Show Your Working (2)
Following on from my first 'Show Your Working' post (here), I was able to use the University facilities to render my high-definition Maya sequences, which could be composited to create a final concept.
After working primarily with Photoshop to create images which developed the style I wanted to create, I built a composition using After Effects which would further the same style, although being applied to an image sequence rather than a single frame.
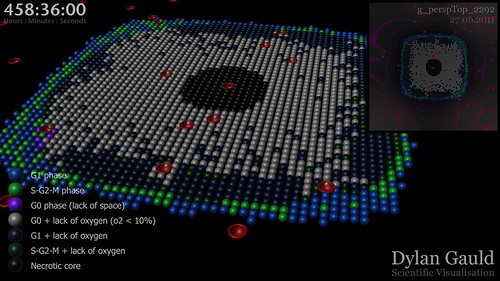
I also took this opportunity to add a time counter to my sequence. This posed it's own problems though, as I did not want a timer that would count real-time frames or seconds/minutes. I wanted a counter which would refer to the appropriate timestep of the cell development process being shown (in this example, where 1 frame was equivalent to 5 minutes of simulation, or 1 second was the same as 2 hours and 5 minutes).
After reading various tutorials online, I was able to find an expression which could be used in After Effects, to achieve the outcome I wanted. I modified the expression to suit my own composition, and applied this to a new text layer, so that it was visible. There was some trial and error involved in the modification, as the time units did not seem to obviously correspond to our time system, so I ended up increasing the expression timesteps gradually until the counter responded as it was intended to. I added a second static text layer, explaining the units being shown on screen (for clarity).
The completed concept has now been built in both Photoshop and After Effects, and can be adapted to suit different render passes, or a longer scene, as necessary.
Saturday, 18 June 2011
Going Stereoscopic
Throughout this week I have been working through some Digital Tutors content, titled "Stereoscopic 3D in Maya" (more information here).
This course has been designed around generating material which can be used to create 3D images and videos (in my case, using the anaglyph method, which is viewable using red/cyan glasses). There was a lot of instruction regarding "safe" 3D which follows an accepted set of rules, and is designed to ensure that the output will not be uncomfortable to view.
Fortunately Maya has had time to develop its stereoscopic toolset before I started using it, making life significantly easier - some helpful features included the ability to adjust interaxial separation and the zero parallax value (which can be visualised using a coloured plane relative to the stereoscopic camera), aswell as showing the 'safe' area for objects to be placed within. There is also a preview mode which allows you to view/playblast anaglyph material before you commit to rendering. The rendering process is also relatively straighforward (and doesnt differ much from normal rendering), as Maya can batch render multiple cameras (centre, left and right).
The Digital Tutors content also gave a good overview of how to combine the left and right images, and colour them appropriately using both Photoshop and After Effects - ensuring that I could apply these techniques to my own work.
After completing the Digital Tutors course, I wanted to experiment with implementing these stereoscopic techniques into my workflow, so I started off with a basic test - a static scene with 5 cubes, randomly rotated and placed at different depths from the camera. The left and right eye renders were composited in Photoshop and can be seen below (don't forget your 3D glasses!);

The next step was to test an animated sequence in After Effects. I created a new scene, with a cube rotating on multiple axes, a sphere moving forwards and backwards (along the Z-axis) and a pyramid rotating on the Y-axis. I chose these shapes and types of movements as it would allow me to see how well each of the different types of motion would work when finished. The completed video can be seen below;
I then chose to add a stereoscopic camera to one of my existing cell visualisation scenes. Unfortunately, when I first rendered this, I realised the cell material was almost black and therefore lost most of it's colour (and therefore depth). I modified the shader to use 50% gray, which worked significantly better. The following 2 images show a still frame taken from my cell visualisation project (the first image is stereoscopic, the second is 'flat' for comparison);


So far, I have found creating anaglyph images mostly straight-forward (thanks to Maya's built in tools which make it much easier). I have learned a huge amount about the different types of stereoscopic 3D, and the rules that should be adhered to. Moving forwards I would definately like to try and apply these techniques to an animated version of the cells growing, although this will require significantly more render time to test... fortunately the render farm is working and I can take advantage of this again!
Thursday, 16 June 2011
Show Your Working (1)
In this post, I wanted to show some of the steps that I undertake when developing my visual ideas.
The following images will detail the different stages of progress when developing a new style for my cell visualisation project. Although I have discussed the key stages, each stage featured multiple iterations (some stages had between 10-20 versions), with subtle differences (particularly when adjusting the 3D elements).
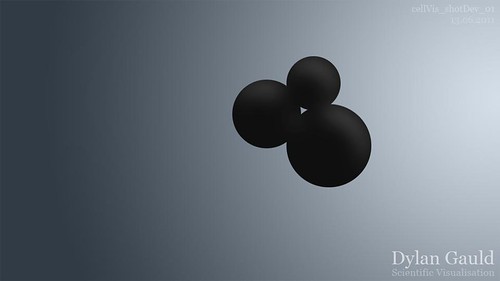
Image 01 shows the initial idea created (quickly) in Photoshop. I was currently working on something else, and this idea had to be 'written down' so that I could develop it fully later. I created a simple version in Photoshop using a radial colour gradient, and basic spheres (to later be replaced with my cells). A simple white highlight was painted onto the spheres, blurred and then lightened to suit.

Image 02 shows a developed version of this 'sketch'. The background has been enhanced in Photoshop, by adding a cloud effect to break the uniformity. The handpainted spheres have been replaced by 3 spheres created and rendered in 3D, using a customised/tweaked Blinn shader.

Image 03 is almost the same as the previous version, although with the addition of an HDRI environment sphere (to create more interesting reflections). By adding the HDRI, both the scene and lighting become more believable, and less 'flat'. A subtle vignette was also added to the image, to help direct the focus of the audience.
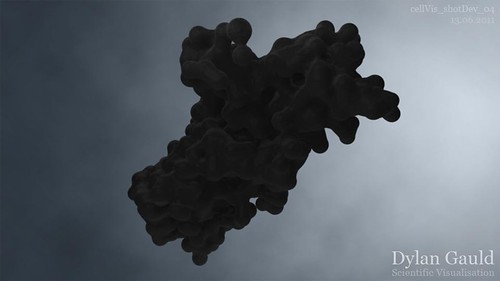
Image 04 applies the new visual style to the 3D cells, whilst using the same background used in image 3 (as this required no further development).
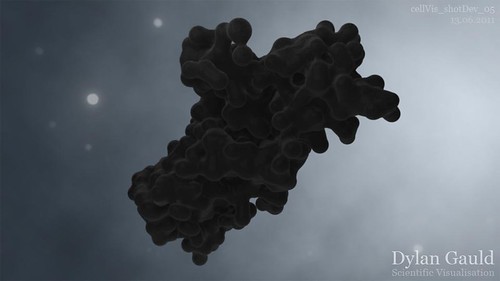
Finally, Image 05 adds a whiter outline to the cells for clarity (by adding a 'xray' render pass over the top during compositing). Pre-rendered particle dust has also been added, although I am unsure if this will be added in the final outcome.
The last stage I would normally complete would be to transform this image into an animated version. Although I have built the final scene using After Effects, I have been unable to batch render the Maya files, as the render-farm has not been working. Once I am able to render, I will post the animated outcome of this concept's development.
Tuesday, 14 June 2011
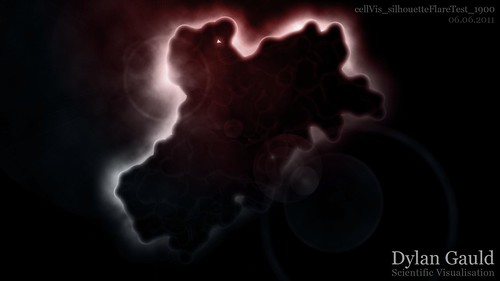
Alternative Styles (2)
Continuing with my development of the visuals that will be used as part of my cell visualisation work, I created another example of how the cell growth could look.
This time, however, the example is intended to be used solely as a still image - a large, high-resolution print. By removing the animation, it creates an entirely different outcome, and allows me to present my work using different techniques and media.
This particular approach also continued the idea of negative space, with the actual cells not being the main focus (as first mentioned here).
The image was created primarily using a matte pass out of Maya (to create an outline/silhouette version of the cells). The 'eclipse' effect was added using both inner and outer glow in Photoshop, with a second silhouette on top, and then using a black-to-white gradient mask to make the eclipse stronger on one side.
A lens flare was added (for dramatic effect) and all layers were merged and desaturated. To break up the 'perfect-ness', a filter-generated cloud texture was added on top of everything (using Overlay as a blending mode), and then colour was added using a filled Colour layer.
Finally, my "xray" pass out of Maya was added on top (very faintly) to bring out some detail of the cell surface. The final result can be seen below;
Although this version has been created using 1920 x 1080 as a resolution, my aim would be to create a significantly higher resolution version for print (if I choose to go down this route). However, I have had problems opening large images rendered out of Maya - previously, I had a 12000 x 8000 pixel version, but Photoshop could not open this file. I currently have a TIFF render image which is 6000 x 4000 pixels, which I plan to start working with soon.
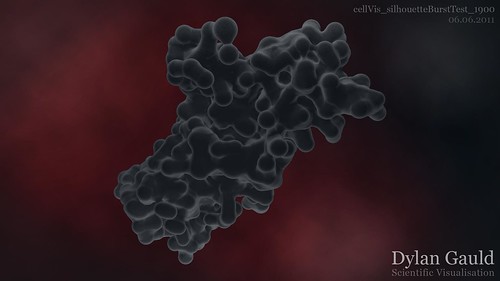
Friday, 10 June 2011
Alternative Styles (1)
As part of the visual development of my project, I have started to explore different styles which could be used to present the outcomes of my technical development.
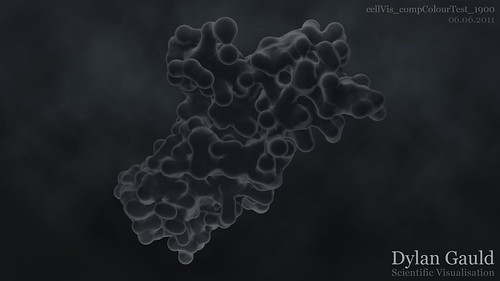
Using the final frame (1900) of one data-set, Adobe Photoshop was used to create several concepts, each of which present the data in slightly different ways. To highlight the differences, this first image shows the style of a very early render, followed by a more recent version (achieved mainly through compositing - more information can be found in a previous post here);
The first of these newer examples (below) tries to maintain simplicity. Although similar to the previous examples, there is nothing going on except the cells growing and expanding, forcing the viewer to focus on this and only this.
I have also chosen to remove the blue colour from the cells, and instead apply a saturated grey colour - this colour choice is much darker and aligns itself more with the fact that it represents the growth of cancer, a potentially fatal condition. This new colour also suits the new background better, whilst still being clearly visible (due to the whiter edges on the cell surface).
From a technical perspective, the gradient background was removed, as this caused problems with banding once compressed. By adding a 'cloudy' background with a small amount of animation (as a final sequence could have) it would minimise visual defects. A subtle vignette was also added, helping to maintain the viewer's focus in the middle of the frame;
The next example uses the same cell appearance, though just with a different background. The background style was inspired by the images here, although has been modified slightly to suit my own tastes. This contrast between the cells and the background, makes the content stand out more - also, the background could potentially be animated (the 'light bursts' could move and/or change colour over time);
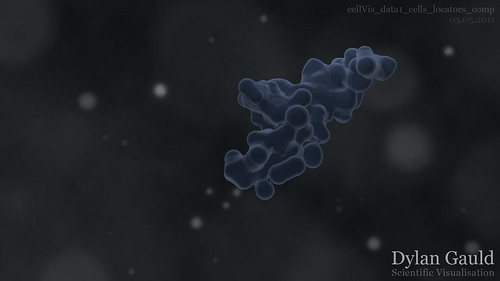
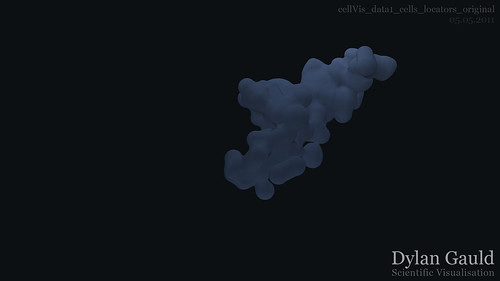
Finally, I wanted to toy with the idea of using negative space (particularly as cancer is something which cannot be 'seen' naturally). So far, the styles created have concentrated on what we can see - instead, I wanted to create an image which had a focus on what we can't see (similar to using a silhouette cut-out). The idea behind this third attempt, is that the background bokeh-style effects could be animated and moving around slowly, but the cell growth would still be happening in the front of the frame. I have also previously conducted experiments, which could enable this background to gain motion (found here).

These ideas have been developed as still images, although they could also be created as animated sequences. By creating images first, it acts as a 'prototype' and lets me see how the final result could look. Moving forwards, I plan on creating more images first and fully exploring the different looks that could be achieved. Once a final style (or more than one) has been chosen, I can then create that as an animated sequence.
Wednesday, 8 June 2011
Creating Dust Effects
Continuing on from my recent work involving compositing in After Effects (here), I decided to explore the different methods of adding dust and/or bokeh effects - either in 3D or 2D based software. My goal was to find the most efficient method of adding the effects that I wanted, without having to learn a large amount of technical skills - allowing me to maintain a focus on the process of visual experimentation.
Initially, I had started by creating dust motes using a particle system in Maya (above). This gives the most flexible result, but is time-consuming. It does factor in object depth however, creating a 3D particle system which objects can be placed inside of.
As a different approach, I tried using the Particular plug-in for After Effects (first used here). This is much simpler to use, and I created a scene with dusty clouds (or could be used as a simple bokeh effect in the background). This created an entirely different result to the Maya particles, as it is not truly 3D, and cannot 'surround' my cell structures. It is much easier to get a nice-looking result quickly though.
The result of my Particular testing can be seen below. It is important to note that I was only testing motion and style, rather than colours, so all of these videos are greyscale purposely;
Finally, I used After Effects to composite the two 'passes' together, out of interest, and decided that although each approach has it's own advantages and disadvantages, they do work well together, because they do different things. The result of this can be seen below;
Although these are relatively short and simple tests, each method can be easily adapted and scaled to fit a larger composition, or longer timeline - something which will be important in the next stages of my projects.
Monday, 6 June 2011
Getting Particular
Between semesters, I decided to briefly sidestep my main programme of study, and play around with After Effects, using Video Co-Pilot as inspiration.
My aim was to take a break from all the technical development I had been working on - avoid scripting - and get back to visual development, so that I could continue down this route when returning to my programme of study at the start of semester 3.
Using an After Effects plug-in, called Particular (by Trapcode - more information here) I set out to create interesting particle-based sequences. To help in this process, I followed through a couple of video tutorials, and then adapted and experimented further to get something really nice looking.
At the moment, I am not sure if these techniques are something I will use moving forwards, but I am still exploring different options, especially when considering how I will present my work at the Masters Show later this year!
Below are two videos which show some of the experimentation that took place;
Sunday, 8 May 2011
Compositing Goodness...
Following on from my most recent post (here), I continued to develop the scene I had been working on as a 2D image in Photoshop (using 3D renders from Maya).
I then added additional layers/objects to the Maya scene file and organised the appropriate render layers. Image sequences were rendered, and imported into After Effects, where a 10-second sequence was constructed - using the same 'style' as the prototype image.
The completed test sequence can be seen below;
Moving forwards, I would like to continue this visual development, perhaps with the addition of camera movement and depth-of-field techniques.
Thursday, 5 May 2011
Having Fun!
In terms of technical development, my knowledge of 3D software, scripting skills and problem solving abilities have surpassed those that I need to be able to complete the projects I am currently working on.
This has given me the time and opportunity to focus on visual experimentation, bringing a bit more fun back into my work, and making it more interesting than searching through pages of MEL commands!
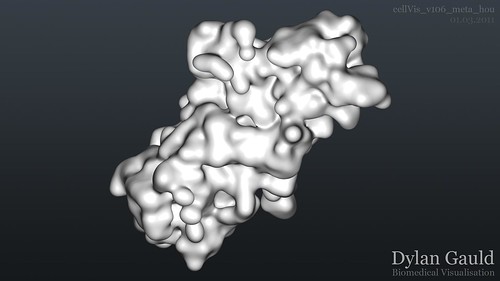
I have been experimenting with using the skills gained in the Going Live module, to enhance the output and presentation of my previous cell visualisation work - using my skills as a digital artist.
Starting with a previous data-set, I adapted one of my scripts to create locators instead of spheres. I then created a simple particle system and used a modified version of a script provided by the external examiner to 'attach' the particles to the locators. This meant that I could use Maya's own 'metaball' system - not strictly metaballs, as it is a particle render type called "Blobby Surfaces", but it gives a similar effect. The image below shows a beauty render of the blobby surfaces;
Once this model had been created, I started to experiment with shaders. After reading some articles in this months 3D Artist and 3D world magazines, I created an MIA mental ray shader, and added a mental ray fast skin shader (normally used for subsurface scattering) and adjusted the colours and attributes to create a suitable look.
I added lighting in the form of two area lights, which used the mental ray area light options to transform from squares into cylinders, 'wrapping' around my geometry. Decay was set to quadratic (to create more accurate lighting) and the intensity of the lights was increased significantly (around 4500 each).
The next stage was to incorporate dust motes floating around. This is something I could imagine in my head, but was not sure how to implement. I looked at adding this in post-production, but although this could be quicker, did not provide enough control (or use 3 dimensions). I created a new scene file and using a particle emitter, created a particle 'explosion' - the forces were then zeroed out, so that I had a static particle cloud. I added my own gravity and turbulence fields, and tweaked these until I had the movement that I liked.
Finally, I setup render layers to output the passes I wanted - a MIA shader pass, a second MIA with an outline style shader, and separate pass for dust motes. After rendering a single frame, I moved into Photoshop and started experimenting with compositing these passes together, to create the look I wanted. I also added some fake bokeh effects in the background, coupled with some randomly generated cloud textures. The final image can be seen below, looking entirely different to how it first started (above);
At this stage, I wanted to make sure that I could recreate this look with image sequences, so I started work in After Effects. Fortunately I was able to mirror this image in video form, and can swap in the rendered image sequences when finished. By working in AE, I realised that I would need to add a matte pass for the cell geometry. Below, a short video shows the breakdown of how this shot was constructed, and although static, shows how a final video could look;
I have thoroughly enjoyed this experimentation, and I have created something I am really happy with - something very different to the first attempts (which can be seen in an earlier post here). Although I don't yet see this as a finished piece, I can already see ideas developing, and it is good to try new techniques and methods of presenting the same mathematical data... more importantly it is good to get back to being an artist, something that I did not realise I missed until now!
Friday, 29 April 2011
Advanced Production (Summary)
Despite returning to Semester 2 later than expected (due to illness), I have made excellent progress, with major breakthroughs in overcoming many of the challenges my project was facing.
My programme of study takes a more visualisation based route, and I am working with the University mathematics division to visualise numerical data (gained from their mathematical models) which represents the growth and development of cancer cells (or solid tumour growth).
Working with numerical data has created it's own set of challenges, as Maya cannot read or interpret this in it's off-the-shelf form. As a result of this problem, I have developed skills in using Maya's own scripting language, MEL (Maya Embedded Language) and also a second scripting language (used more widely) called Python. Although this has been a difficult and time-consuming process (several months of learning, which is still ongoing) I have been able to harness this new understanding and create custom tools which can be used to read the mathematical data and create appropriate 3D geometry.
Throughout learning each scripting language, I referred primarily to online sources, and the 'official' documentation provided. I also used the Digital Tutors service, which was both informative and relevant, helping me overcome the hurdle of knowing where to start, and what to focus on.
Through creating my own custom tools, I was able to work with the numerical data-sets provided. Starting with simple tests, I was (eventually) able to construct fully animated scenes containing simple spheres, representing the individual cancer cells, and although time-consuming to process, these results opened the way for more advanced development of the data and it's visual attributes.
I spent some time experimenting with Maya's render layers, and compositing passes using Nuke. This was as a response to feedback given last semester - not everything has to be done in 3D, as it can often be quicker and easier to complete some work in 3D, but fine-tune the details in post-production. This helped me develop possible ideas for the look of cells, when considering texture on a microscopic basis, and I also experimented with 'faking' depth-of-field techniques to enhance this.
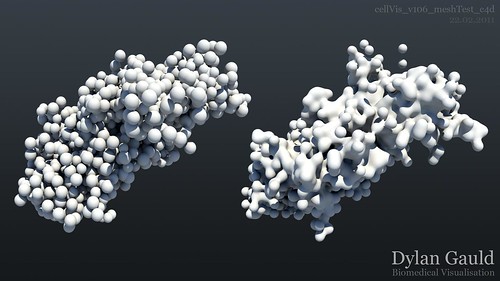
Although creating spheres was great, I wanted to push my skills further. I spent time working with RealFlow, Cinema 4D and Houdini - three great 3D packages. With the exception of RealFlow, these were entirely new to me, and although Cinema 4D was fairly straight-forward, Houdini had a very steep learning curve. Using my Python scripting skills, I created a large-scale metaball system, equivalent to the spheres created in Maya - this was a challenging task, forcing me to solve several problems, whilst trying to script in a language mostly new to myself. The result of this technical experimentation allowed me to create an interesting almost-organic 3D structure, which moved and behaved as one surface, instead of 1068 individual cells.
After completing these Python related tasks, I returned to Maya to work with additional data-sets, still showing the growth and development of cancer cells, but in a different format. This data would require not only animated movement of cells, but changing colours, and eventually, complex density 'clouds'.
The difficulty at this stage in my work, was the size of the data-sets... one of which contains over 30 million lines of information (a text file weighing in at around 800mb). Despite breaking this into smaller chunks of data, it was still computationally intense, and difficult to work with (often crashing high speed computers). I spent time streamlining and optimising my scripts, and the way they handled the data - as an example, my oxygen density script was originally taking around 350 seconds per frame to process, whereas now it takes around 90 seconds, about a quarter of the time. As I have learned more about MEL, and gained a better understanding of the language, I have been constantly improving and refining my scripts, to ensure the best efficiency when working with large data sets.
I am currently working with new additional data-sets, which again have constantly required me to think and problem solve... now that my scripts are optimised, I am confident that my scripting abilities are suited to a wide range of data types, across two very different scripting languages. This allows me to tackle upcoming problems with new knowledge, based on the experiences I have had over the last ~3 months, giving me a definite headstart.
In summary, my practice-based learning has developed the following;
Due to the sensitive nature of the mathematical data I am working with (and as the source data is effectively the result of unpublished research) I am unable to post a large amount of my visual work online. However, this sensitive material will be made privately available during course presentations, and to module assessors as necessary.
My programme of study takes a more visualisation based route, and I am working with the University mathematics division to visualise numerical data (gained from their mathematical models) which represents the growth and development of cancer cells (or solid tumour growth).
Working with numerical data has created it's own set of challenges, as Maya cannot read or interpret this in it's off-the-shelf form. As a result of this problem, I have developed skills in using Maya's own scripting language, MEL (Maya Embedded Language) and also a second scripting language (used more widely) called Python. Although this has been a difficult and time-consuming process (several months of learning, which is still ongoing) I have been able to harness this new understanding and create custom tools which can be used to read the mathematical data and create appropriate 3D geometry.
Throughout learning each scripting language, I referred primarily to online sources, and the 'official' documentation provided. I also used the Digital Tutors service, which was both informative and relevant, helping me overcome the hurdle of knowing where to start, and what to focus on.
Through creating my own custom tools, I was able to work with the numerical data-sets provided. Starting with simple tests, I was (eventually) able to construct fully animated scenes containing simple spheres, representing the individual cancer cells, and although time-consuming to process, these results opened the way for more advanced development of the data and it's visual attributes.
I spent some time experimenting with Maya's render layers, and compositing passes using Nuke. This was as a response to feedback given last semester - not everything has to be done in 3D, as it can often be quicker and easier to complete some work in 3D, but fine-tune the details in post-production. This helped me develop possible ideas for the look of cells, when considering texture on a microscopic basis, and I also experimented with 'faking' depth-of-field techniques to enhance this.
Although creating spheres was great, I wanted to push my skills further. I spent time working with RealFlow, Cinema 4D and Houdini - three great 3D packages. With the exception of RealFlow, these were entirely new to me, and although Cinema 4D was fairly straight-forward, Houdini had a very steep learning curve. Using my Python scripting skills, I created a large-scale metaball system, equivalent to the spheres created in Maya - this was a challenging task, forcing me to solve several problems, whilst trying to script in a language mostly new to myself. The result of this technical experimentation allowed me to create an interesting almost-organic 3D structure, which moved and behaved as one surface, instead of 1068 individual cells.
After completing these Python related tasks, I returned to Maya to work with additional data-sets, still showing the growth and development of cancer cells, but in a different format. This data would require not only animated movement of cells, but changing colours, and eventually, complex density 'clouds'.
The difficulty at this stage in my work, was the size of the data-sets... one of which contains over 30 million lines of information (a text file weighing in at around 800mb). Despite breaking this into smaller chunks of data, it was still computationally intense, and difficult to work with (often crashing high speed computers). I spent time streamlining and optimising my scripts, and the way they handled the data - as an example, my oxygen density script was originally taking around 350 seconds per frame to process, whereas now it takes around 90 seconds, about a quarter of the time. As I have learned more about MEL, and gained a better understanding of the language, I have been constantly improving and refining my scripts, to ensure the best efficiency when working with large data sets.
I am currently working with new additional data-sets, which again have constantly required me to think and problem solve... now that my scripts are optimised, I am confident that my scripting abilities are suited to a wide range of data types, across two very different scripting languages. This allows me to tackle upcoming problems with new knowledge, based on the experiences I have had over the last ~3 months, giving me a definite headstart.
In summary, my practice-based learning has developed the following;
- Scripting - both MEL and Python, for simple and complex tasks (including 3D visualisation)
- Improved software knowledge - Maya, RealFlow, Nuke
- New software knowledge - Cinema 4D, Houdini
- Advanced 3D skills development - particles/dynamics, data input/output, script optimisation, rendering
- Experience in 2D compositing with 3D-based image sequences
Due to the sensitive nature of the mathematical data I am working with (and as the source data is effectively the result of unpublished research) I am unable to post a large amount of my visual work online. However, this sensitive material will be made privately available during course presentations, and to module assessors as necessary.
Sunday, 17 April 2011
Visible Progress!
Over the last couple of weeks, my role in the Going Live project increased significantly, and then stopped completely. All of the animated shots had lighting added, and then I added the render layers/passes and started feeding completed shots through the render farm (which was considerably faster than I expected it to be). Sound effects and music were then added by the sound team, creating our finished advert.
It took a long time to get there, and there were problems along the way, but I learned a lot (particularly about rendering and compositing) and I am glad we all got there in the end! Next week, we are due to meet with the company in their London studio and present our finished project - hopefully the feedback will be good!
As for my cell visualisation work, this has been making good progress since my role in Going Live has lessened.
The first data-set I was working with, which represented cells and fibres in 2D space, now has fully working scripts, which are streamlined to work efficiently (or to actually work at all!). I am currently awaiting feedback on the video outcome of this work, so that I can decide where to take this next.
The other data-sets (involving cells, blood vessels, and oxygen density maps) have made even better progress. Again, after optimising my MEL scripts, the amount of data (several million lines of information) has become manageable, although time-consuming to process. I am currently part of the way through 'translating' this data into Maya's 3D environment.
An example render from the cells file can be seen below. This example frame is approximately two thirds of the way through the cell data, and incorporates some 'noise' on the cell surfaces to break up the uniformity (an idea suggested by the mathematician who provided the data);

As for the oxygen density, I decided to continue using a single polygonal plane for this, with grid points in the data having a matching vertex on the 3D geometry. The data then lifts/lowers each grid point/vertex between 0 and 1, where 1 is the most dense area of the oxygen 'clouds'.
The 'look' of these clouds is then controlled using one of two shaders.
Shader 1 ("Clouds") is coloured white, and uses a vertically-aligned ramp shader for it's transparency value, where 0 is fully transparent and 1 is fully visible. This means that as points on the vertex grid are changed in the Y-axis, their transparency is also changed (as they are moved higher, they become more visible).
Shader 2 ("Bands") expands upon this idea, and uses a second ramp for the colour (from blue to red, low to high). The transparency ramp is also 'sliced' into bands which are evenly spaced vertically - this means that only the narrow bands are visible, giving us slices of colour (where the colour is defined by where the slice falls on the colour ramp, rather than a fixed colour). This gives a result similar to the high/low pressure bands which weather presenters often use, but with colour added.
I have included a video below, which better explains these shaders - the white 'cloud' is shader 1, and the coloured 'bands' are shader 2;
Although this video shows a top-down view of the scene, it is important to remember that these effects are generated in 3D - moving forwards, I could include moving camera or changing points of view to highlight particular events.
Also, the oxygen density visuals are considered another 'layer' which I can add to the cells and blood vessels, creating a more complete final output.
I am not sure as to how this final output will look at the moment, as I am still developing the visual elements of each of the data-sets, but progress is good and things are at least working now...
Sunday, 27 March 2011
Needs more juice...
Similar to my last blog entry, my efforts are still divided between two main projects;
The Going Live project has been making excellent progress. The team and I have continued improving the visual outcome of the 3D elements. With a texture in place, lighting and rendering have started to progress rapidly. Animated shots are being lit, rendered and composited, so that final testing can take place.
Although I have taken on the role of CG Supervisor, I have been involved in other areas, and responsible for others. I was involved in tracking the camera footage and creating a 3D pre-visualisation of the sequence. I have monitored the 3D pipeline continuously, and offered advice and created fixes for problems - this includes working with others in modeling, texturing, rigging, animation, and lighting. I was responsible for creating a dynamic cloth system which would allow for easier animation, and I have managed the rendering process (involving creating render layers and using the render farm). Finally, I get to pass rendered scenes to the compositing team, who can work their magic... and before I know it, we will have finished the advert!
Returning to my cell visualisation work, I have reached a temporary plateau. I have developed my pipeline/workflow and have implemented new and improved scripts to manage the new data that I have received from my colleagues in the Mathematics division.
However, the vast quantity of data has been as proving difficult to process efficiently. After some development, I have speeded up the process, but this still takes a considerable amount of time to complete. Fortunately, I discussed this with my project supervisor/programme leader, and agreed the use of high-specification computers in the University, where I can process data quickly, making use of round-the-clock facilities. This week, I will begin using these facilities, to start working with this new data that I have received.
It is important that I begin this early, as the sooner the numerical data has been translated into 3D space, the sooner I can begin developing the visual qualities of the mathematical models. Completing this visualisation process becomes even more important, as the mathematical models will be presented as part of a conference in June - giving me a deadline to work towards...
Wednesday, 16 March 2011
More Data
Over the last couple of weeks, I have had to divide my attention between multiple projects.
The 'Going Live' project has ramped up into production, with modeling and rigging now complete. Animation has started, and texturing is currently underway. My role as CG Supervisor has been demanding, as all of these CG elements have been happening in quick succession. On top of this role, I was also responsible for implementing a customised nCloth dynamics system for our 'character'. This was created alongside the rigging process, to ensure that these components would work together happily, and after resolving a few technical problems, the system is now working nicely. My next task was to create and organise the appropriate render layers in Maya, ready for rendering and then compositing to take place (hopefully late this week or early next). Although I had worked with render layers before, this project requires more variants than I am used to working with, so has taken a bit of time to configure and setup properly. Despite all this work taking up more time than initially expected, the project has made good progress, and continues to do so.
After my meeting with mathematics last week (and several more since), my cell visualisation workload has increased also. I have received new data from both students, and I am currently in the process of writing scripts that will translate these into 3D scenes inside Maya.
The first new data set contains fibres (to be added to cells), which are based on xyz locations and xy rotations. I had not scripted rotation values yet, so this was a good opportunity to expand my knowledge of MEL. I am currently awaiting the full data-set for this part of the visualisation, so will continue to work on this moving forwards.
The other data set adds oxygen density to a scene containing cancer cells and blood vessels. This file contains over 30 million lines of information, and weighs in at around 800mb - making it rather difficult to work with. I have tried different approaches in visualising this data efficiently, such as adjusting transparency on cubes based on the density value or scaling particle clouds. Unfortunately, there are about 10,200 points per frame, so these methods take far too long to calculate. I am currently testing a new method, which creates a single polygonal plane, with the required number of vertices. The script then runs through each vertice, and moves it in the y-axis based on the density value (between 0 and 1). A ramp shader then adjusts the transparency of the plane based on the height (where 0 density is fully transparent). This creates white, cloudy patches where oxygen density is high. Although this still takes a long time to process, it is considerably faster than the other methods.
Most of this work is still on-going, and has 'arrived' at the same time, making it difficult to balance. Fortunately, I have been able to allow extra time in working on these projects, so hopefully the worst of it is over now...
On a more exciting note, three of my videos were used at an event in Dundee on Saturday 12th March. The videos are 3D visualisations of mathematical models which are being used to predict cancer growth and development, and were developed in collabroation with a PhD student in the University's mathematics division. They were shown at an event called "Sensational Women in Science" as part of the Women in Science Festival 2011.
Also, some of the other data I am currently working with will be presented at a large conference later this year (in June), so I have a deadline which I can work towards.
Tuesday, 1 March 2011
Snake In The Grass
...more specifically, a Python.
Continuing on from my Cinema 4D experimentation with metaballs, I abandoned that line of testing, as it wasn't going to be a viable option for the large amount of cells I was dealing with. Alongside Digital Tutors, I returned to Python scripting, trying to 'translate' my MEL script into something useable inside of Houdini.
After almost a week's worth of scripting, fixing things, and re-scripting, the Python/Houdini version of my data-loading script works, creating all of the necessary nodes in Houdini, and keyframing all of the animation. This allowed me to natively create metaballs, rather than try and convert existing scene information. Houdini handles metaballs exceptionally well, adjusting the viewport geometry on the fly (so it doesnt crash regularly like Cinema 4D). Using Mantra, I was able to render out the full 1900 frame image sequence, with frame 1900 shown below;
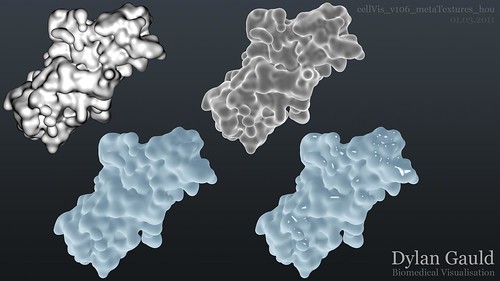
Although I am still learning to use Houdini, I have made breakthrough progress in using the software alongside Python, opening up a whole range of new opportunities. I have started trying to figure out shaders and lighting in Houdini (which seems more difficult than expected), and I created some example 'looks' for my meta-surface, shown below;
I am due to meet with the mathematics department this week, where I will present all of my research, ideas, and generated media - bearing in mind, that they have not seen any of the results so far. I am hoping that this meeting will help inform my next steps, and direct my technical understanding to a new visual solution.
Tuesday, 22 February 2011
Going To The Cinema
This morning, I stumbled across a fantastic website, called Molecular Movies. It describes itself as a 'portal to cell and molecular animation' and aims to provide scientists with tutorials on developing 3D visualisation skills.
Alongside tutorials, the website has a showcase section, with examples of 3D being used to visualise complex biological scenes - although these are interesting to watch, the scientific content is a bit beyond my own knowledge. Fortunately (and more importantly), it is useful to have a 'database' of the kind of work that is going on in my field.
Returning to the learning resources, I realised I had already covered the majority of content, as it was designed for those new to using 3D. That is, until I found an interesting article on using metaballs to create molecular surfaces, using Cinema 4D. Although I was not familiar with using C4D, I decided it was worth looking at it, as it was going to less technically challenging than learning Houdini (which is also reliant on Python), and should give a similar result.
Creating metaballs in C4D was fairly straight forward, and gave great results with very little input. It took a bit of time to figure out how to animate objects, and then render a scene, but after using the software, I would definately be confident using it again. The geometry was also significantly 'cheaper' than my testing in RealFlow, and could be used on a large scale. A video example of metaballs in action can be seen below;
The next step was to take my cell data-set and use metaballs to create a single organic structure - this proved substantially more difficult. Realising that I couldn't simply 'read' my data, as C4D also relies on Python, I opted to export both OBJ and FBX files from Maya, hoping that at least one would work.
These imported easily, and a metaball surface could be applied, but did not work properly (simply creating one large sphere). After vast amounts of experimentation, I scaled the imported objects... and success! A simple fix for what seemed like a complicated problem. This breakthrough meant that I could now take objects into Cinema 4D, use metaballs to create a surface, and either render, or export to Maya for render (as I am more familiar with the software package).
The only difficulty now, is that this workflow currently only works on single frames, and can't be applied to my animated data-set... this is the next problem to solve! A render of the results so far can be seen below (showing a before/after comparison);
After my previous post, I felt like I had reached a brick wall, but after discovering the Molecular Movies website, it has helped me hurdle these difficulties... only to find a new hurdle waiting on the other side!
Monday, 21 February 2011
Reaching Limits...
This week has proven difficult in terms of my ideas being restricted in their implementation, primarily by the software/technology I have available.
Scripting has made a reasonable amount of progress. I have added colour changes to my first data-set, as it was not clear when cells 'appeared'. New cells begin red, and fade to their regular colour over 25 frames (1 second), which is more informative, and better communicates the data visually. It is important to point out here, that this change was added to the MEL version of my script. A render taken from the Maya scene can be seen below;

I started developing skills in scripting using Python, as Houdini relies on this for data input. Python also crosses over with Maya as the shared 'language'. I began by trying to find the common links between MEL and Python, which accelerated my understanding of how to code effectively in Python and make things happen. The Maya-Python version of the script is now equivalent to the MEL script.
However, the Houdini-Python script currently only reads data, but does not yet generate or animate geometry - I am having difficulties finding useful information on the Houdini specific Python module (commands), so this part of scripting is on hold for now.
Due to these difficulties, I returned to Maya, and started work on trying to create an organic-looking cell surface - that is, a single surface which is created from all of the cells, and moves and acts as one (instead of 1067 individual cell 'spheres'). Initially, I wanted to generate a particle field in place of spheres, but, unfortunately, Maya does not allow transformation of individual particles within a particle object. There is no way around this, except by creating a separate particle object per cell - by doing this however, the particles can no longer merge together as one.
I started to consider other options to achieve this organic look, with RealFlow being top of my list. I generated a 'particle sphere' in Maya and exported this directy into RealFlow. After developing a complicated workflow of imports and exports, and a lot of experimentation, I was able to then use RealFlow to mesh this particle field. However, for one cell to be meshed fully, I required around 37,000 particles, generating approximately 110,000 faces for the mesh. With a scene containing 1067 cells, I realised that although giving a nice result, it was certainly not a viable option. A render of the style of cell-split can be seen below;
Beyond using RealFlow, my next efforts will involve using particles or metaballs in Houdini. Metaballs work very nicely (tested using 2-3 objects manually), and are 'clever' spheres which merge together when they are close to each other (without any configuration in Houdini, metaballs give a great looking result). Particles in Houdini will hopefully offer more flexibility than Maya, allowing me another technique to create the look that I want to achieve.
Although I have found this week frustrating, finding limitations in the software I am using, I am confident that I will be able to find a solution, allowing me to realise the full potential of the creative ideas I want to unleash...
Subscribe to:
Posts (Atom)