Wednesday 29 June 2011

Composited Sequence

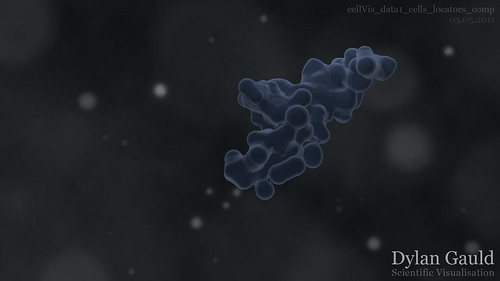
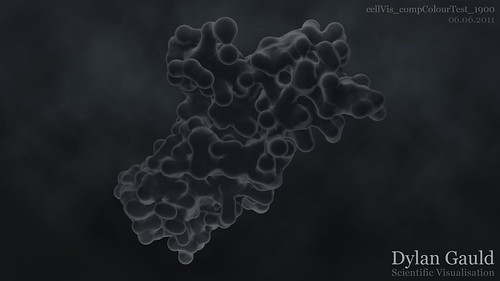
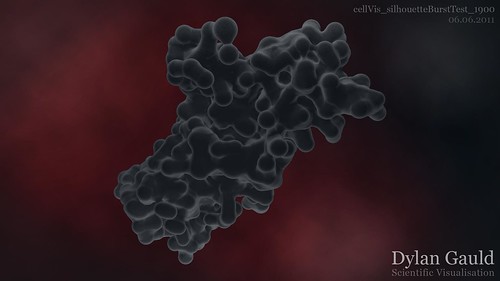
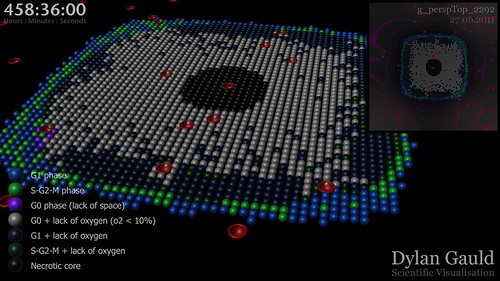
As part of my cell visualisation project, I have been working on a second set of data, which also represents the growth and development of cancer cells. This dataset however, focuses on the stage of which the individual cells are in, with the intention of identifying the most effective time for treatment to take place.

With thanks to one of the mathematicians working in this area, I was provided with a large quantity of data (around 33 million lines of numerical information) which had been generated, and could be used to drive my 3D visualisation. I created a MEL script which could 'read' each section of this data and then generate/animate the appropriate objects in 3D space.

After completing this stage, I then setup the scenes for rendering - adding lighting, placing cameras, adjusting render settings and creating render layers. Using the VERL render farm, I generated approximately 33,000 renders which could be composited together to create a completed 3000 frame sequence (depicting 600 hours of cell growth and development).

Using After Effects, I combined all of the image sequences and created several individual compositions which would be layered to create the final output. Because almost all of the work had been completed in Maya, there was very little that had to be done in After Effects, except combine the appropriate layers. Rather than generate a QuickTime MOV, I rendered a master image sequence (after speaking to one of my classmates) which could then be used to create suitable video files as and when needed.

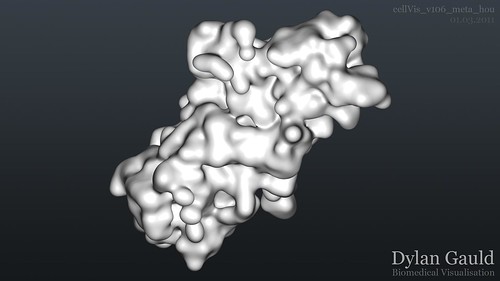
Because the source of my output comes from unpublished mathematical models, I am unable to post any of the video online (it would be unfair to the ongoing research still being carried out). Instead, I have opted to include an image of a single frame, which can be seen below;

g_perspTop_2292

Over the next few weeks, I will be meeting with the mathematician that I created this for, as there are several upcoming maths conferences and events where my work could be used to illustrate the research they are carrying out.

Monday 27 June 2011

RealFlow Character Fill

Over the last couple of weeks I have been working on a shot for one of the other students on my course. Kaye is working on applying an illustration style to an animated commercial, and her blog can be found here.

After creating her animatic, Kaye's opening shot showed a 3D character filling up with liquid, and she had decided to use RealFlow's liquid simulation tools to achieve this. I already had previous experience of working with RealFlow and was able to help her in building this sequence.

To begin with, I imported her character model (built using Cinema 4D) and created emitters in each of the feet. My target was to fill the model in approximately 180 frames, as this is what Kaye had advised. I started by filling the model using these two emitters, and adjusted the emission speeds to suit the fill rate I wanted. Around halfway up the model, it became slightly more difficult, as I had added two additional emitters (one in each hand) and then needed to try and balance the levels of the fluid (this involved manually keyframing each emitter and re-simulating the liquid several times, a time-consuming process). Upon reaching the head, a fifth emitter was added, to speed up filling the volume (as the narrow neck creating a fountain-like bottleneck). Finally, a polygonal mesh was added, and the radius size adjusted so that the mesh was not larger than the original model.

At this point, I passed the source files back to Kaye to implement in her own project. As an additional step I imported the RealFlow files into Maya and created a simple render to show the outcome of this short project;

Monday 20 June 2011

Show Your Working (2)

Following on from my first 'Show Your Working' post (here), I was able to use the University facilities to render my high-definition Maya sequences, which could be composited to create a final concept.

After working primarily with Photoshop to create images which developed the style I wanted to create, I built a composition using After Effects which would further the same style, although being applied to an image sequence rather than a single frame.

I also took this opportunity to add a time counter to my sequence. This posed it's own problems though, as I did not want a timer that would count real-time frames or seconds/minutes. I wanted a counter which would refer to the appropriate timestep of the cell development process being shown (in this example, where 1 frame was equivalent to 5 minutes of simulation, or 1 second was the same as 2 hours and 5 minutes).

After reading various tutorials online, I was able to find an expression which could be used in After Effects, to achieve the outcome I wanted. I modified the expression to suit my own composition, and applied this to a new text layer, so that it was visible. There was some trial and error involved in the modification, as the time units did not seem to obviously correspond to our time system, so I ended up increasing the expression timesteps gradually until the counter responded as it was intended to. I added a second static text layer, explaining the units being shown on screen (for clarity).

The completed concept has now been built in both Photoshop and After Effects, and can be adapted to suit different render passes, or a longer scene, as necessary.

Saturday 18 June 2011

Going Stereoscopic

Throughout this week I have been working through some Digital Tutors content, titled "Stereoscopic 3D in Maya" (more information here).

This course has been designed around generating material which can be used to create 3D images and videos (in my case, using the anaglyph method, which is viewable using red/cyan glasses). There was a lot of instruction regarding "safe" 3D which follows an accepted set of rules, and is designed to ensure that the output will not be uncomfortable to view.

Fortunately Maya has had time to develop its stereoscopic toolset before I started using it, making life significantly easier - some helpful features included the ability to adjust interaxial separation and the zero parallax value (which can be visualised using a coloured plane relative to the stereoscopic camera), aswell as showing the 'safe' area for objects to be placed within. There is also a preview mode which allows you to view/playblast anaglyph material before you commit to rendering. The rendering process is also relatively straighforward (and doesnt differ much from normal rendering), as Maya can batch render multiple cameras (centre, left and right).

The Digital Tutors content also gave a good overview of how to combine the left and right images, and colour them appropriately using both Photoshop and After Effects - ensuring that I could apply these techniques to my own work.

After completing the Digital Tutors course, I wanted to experiment with implementing these stereoscopic techniques into my workflow, so I started off with a basic test - a static scene with 5 cubes, randomly rotated and placed at different depths from the camera. The left and right eye renders were composited in Photoshop and can be seen below (don't forget your 3D glasses!);

cellVis_anaglyphImageTest

The next step was to test an animated sequence in After Effects. I created a new scene, with a cube rotating on multiple axes, a sphere moving forwards and backwards (along the Z-axis) and a pyramid rotating on the Y-axis. I chose these shapes and types of movements as it would allow me to see how well each of the different types of motion would work when finished. The completed video can be seen below;


I then chose to add a stereoscopic camera to one of my existing cell visualisation scenes. Unfortunately, when I first rendered this, I realised the cell material was almost black and therefore lost most of it's colour (and therefore depth). I modified the shader to use 50% gray, which worked significantly better. The following 2 images show a still frame taken from my cell visualisation project (the first image is stereoscopic, the second is 'flat' for comparison);

cellVis_mayaAnaglyphTest

cellVis_mayaAnaglyphTest_flat

So far, I have found creating anaglyph images mostly straight-forward (thanks to Maya's built in tools which make it much easier). I have learned a huge amount about the different types of stereoscopic 3D, and the rules that should be adhered to. Moving forwards I would definately like to try and apply these techniques to an animated version of the cells growing, although this will require significantly more render time to test... fortunately the render farm is working and I can take advantage of this again!

Thursday 16 June 2011

Show Your Working (1)

In this post, I wanted to show some of the steps that I undertake when developing my visual ideas.

The following images will detail the different stages of progress when developing a new style for my cell visualisation project. Although I have discussed the key stages, each stage featured multiple iterations (some stages had between 10-20 versions), with subtle differences (particularly when adjusting the 3D elements).

cellVis_shotDev_01

Image 01 shows the initial idea created (quickly) in Photoshop. I was currently working on something else, and this idea had to be 'written down' so that I could develop it fully later. I created a simple version in Photoshop using a radial colour gradient, and basic spheres (to later be replaced with my cells). A simple white highlight was painted onto the spheres, blurred and then lightened to suit.

cellVis_shotDev_02

Image 02 shows a developed version of this 'sketch'. The background has been enhanced in Photoshop, by adding a cloud effect to break the uniformity. The handpainted spheres have been replaced by 3 spheres created and rendered in 3D, using a customised/tweaked Blinn shader.

cellVis_shotDev_03

Image 03 is almost the same as the previous version, although with the addition of an HDRI environment sphere (to create more interesting reflections). By adding the HDRI, both the scene and lighting become more believable, and less 'flat'. A subtle vignette was also added to the image, to help direct the focus of the audience.

cellVis_shotDev_04

Image 04 applies the new visual style to the 3D cells, whilst using the same background used in image 3 (as this required no further development).

cellVis_shotDev_05

Finally, Image 05 adds a whiter outline to the cells for clarity (by adding a 'xray' render pass over the top during compositing). Pre-rendered particle dust has also been added, although I am unsure if this will be added in the final outcome.

The last stage I would normally complete would be to transform this image into an animated version. Although I have built the final scene using After Effects, I have been unable to batch render the Maya files, as the render-farm has not been working. Once I am able to render, I will post the animated outcome of this concept's development.

Tuesday 14 June 2011

Alternative Styles (2)

Continuing with my development of the visuals that will be used as part of my cell visualisation work, I created another example of how the cell growth could look.

This time, however, the example is intended to be used solely as a still image - a large, high-resolution print. By removing the animation, it creates an entirely different outcome, and allows me to present my work using different techniques and media.

This particular approach also continued the idea of negative space, with the actual cells not being the main focus (as first mentioned here).

The image was created primarily using a matte pass out of Maya (to create an outline/silhouette version of the cells). The 'eclipse' effect was added using both inner and outer glow in Photoshop, with a second silhouette on top, and then using a black-to-white gradient mask to make the eclipse stronger on one side.

A lens flare was added (for dramatic effect) and all layers were merged and desaturated. To break up the 'perfect-ness', a filter-generated cloud texture was added on top of everything (using Overlay as a blending mode), and then colour was added using a filled Colour layer.

Finally, my "xray" pass out of Maya was added on top (very faintly) to bring out some detail of the cell surface. The final result can be seen below;

cellVis_silhouetteFlareTest_1900

Although this version has been created using 1920 x 1080 as a resolution, my aim would be to create a significantly higher resolution version for print (if I choose to go down this route). However, I have had problems opening large images rendered out of Maya - previously, I had a 12000 x 8000 pixel version, but Photoshop could not open this file. I currently have a TIFF render image which is 6000 x 4000 pixels, which I plan to start working with soon.

Friday 10 June 2011

Alternative Styles (1)

As part of the visual development of my project, I have started to explore different styles which could be used to present the outcomes of my technical development.

Using the final frame (1900) of one data-set, Adobe Photoshop was used to create several concepts, each of which present the data in slightly different ways. To highlight the differences, this first image shows the style of a very early render, followed by a more recent version (achieved mainly through compositing - more information can be found in a previous post here);

cellVis_v106_meta_hou

cellVis_data1_cells_locators_comp

The first of these newer examples (below) tries to maintain simplicity. Although similar to the previous examples, there is nothing going on except the cells growing and expanding, forcing the viewer to focus on this and only this.

I have also chosen to remove the blue colour from the cells, and instead apply a saturated grey colour - this colour choice is much darker and aligns itself more with the fact that it represents the growth of cancer, a potentially fatal condition. This new colour also suits the new background better, whilst still being clearly visible (due to the whiter edges on the cell surface).

From a technical perspective, the gradient background was removed, as this caused problems with banding once compressed. By adding a 'cloudy' background with a small amount of animation (as a final sequence could have) it would minimise visual defects. A subtle vignette was also added, helping to maintain the viewer's focus in the middle of the frame;

cellVis_compColourTest_1900

The next example uses the same cell appearance, though just with a different background. The background style was inspired by the images here, although has been modified slightly to suit my own tastes. This contrast between the cells and the background, makes the content stand out more - also, the background could potentially be animated (the 'light bursts' could move and/or change colour over time);

cellVis_silhouetteBurstTest_1900

Finally, I wanted to toy with the idea of using negative space (particularly as cancer is something which cannot be 'seen' naturally). So far, the styles created have concentrated on what we can see - instead, I wanted to create an image which had a focus on what we can't see (similar to using a silhouette cut-out). The idea behind this third attempt, is that the background bokeh-style effects could be animated and moving around slowly, but the cell growth would still be happening in the front of the frame. I have also previously conducted experiments, which could enable this background to gain motion (found here).

cellVis_silhouetteBokehTest_1900

These ideas have been developed as still images, although they could also be created as animated sequences. By creating images first, it acts as a 'prototype' and lets me see how the final result could look. Moving forwards, I plan on creating more images first and fully exploring the different looks that could be achieved. Once a final style (or more than one) has been chosen, I can then create that as an animated sequence.

Wednesday 8 June 2011

Creating Dust Effects

Continuing on from my recent work involving compositing in After Effects (here), I decided to explore the different methods of adding dust and/or bokeh effects - either in 3D or 2D based software. My goal was to find the most efficient method of adding the effects that I wanted, without having to learn a large amount of technical skills - allowing me to maintain a focus on the process of visual experimentation.


Initially, I had started by creating dust motes using a particle system in Maya (above). This gives the most flexible result, but is time-consuming. It does factor in object depth however, creating a 3D particle system which objects can be placed inside of.

As a different approach, I tried using the Particular plug-in for After Effects (first used here). This is much simpler to use, and I created a scene with dusty clouds (or could be used as a simple bokeh effect in the background). This created an entirely different result to the Maya particles, as it is not truly 3D, and cannot 'surround' my cell structures. It is much easier to get a nice-looking result quickly though.

The result of my Particular testing can be seen below. It is important to note that I was only testing motion and style, rather than colours, so all of these videos are greyscale purposely;


Finally, I used After Effects to composite the two 'passes' together, out of interest, and decided that although each approach has it's own advantages and disadvantages, they do work well together, because they do different things. The result of this can be seen below;


Although these are relatively short and simple tests, each method can be easily adapted and scaled to fit a larger composition, or longer timeline - something which will be important in the next stages of my projects.

Monday 6 June 2011

Getting Particular

Between semesters, I decided to briefly sidestep my main programme of study, and play around with After Effects, using Video Co-Pilot as inspiration.

My aim was to take a break from all the technical development I had been working on - avoid scripting - and get back to visual development, so that I could continue down this route when returning to my programme of study at the start of semester 3.

Using an After Effects plug-in, called Particular (by Trapcode - more information here) I set out to create interesting particle-based sequences. To help in this process, I followed through a couple of video tutorials, and then adapted and experimented further to get something really nice looking.

At the moment, I am not sure if these techniques are something I will use moving forwards, but I am still exploring different options, especially when considering how I will present my work at the Masters Show later this year!

Below are two videos which show some of the experimentation that took place;